


Thanksgiving is the day of the turkey.
Decorating with turkeys and eating turkeys, the day is even sometimes called “Turkey Day.” It’s quite a departure from the actual history of Thanksgiving but is a fitting label for the last Thursday of November.
For those not spending most of Wednesday and Thursday cooking, the break can start to feel devoid of Thanksgiving spirit. So for those who don’t feel as though they have enough Thanksgiving decorations and an abundance of time on their hands, this is a simple turkey decoration that can be created in a few hours.
What you need:
-
Two Styrofoam balls, one much smaller than the other, and preferably of the smooth variety
-
Brown acrylic paint and a brush. A sponge brush is a cheap solution since there is no detail work necessary; you’ll only need it for painting a giant globe.
-
Two white pins (the ones typically used in sewing)
-
Some straight pins without a colored ball on top, as the white sewing pins do
-
Construction or scrap-booking paper in red, yellow and orange
-
Glue
-
Wire, preferably 12 gauge and copper colored (that’s what was used for the example; it works well and looks good!)
-
Pliers and a wire cutter
How to put it together:
-
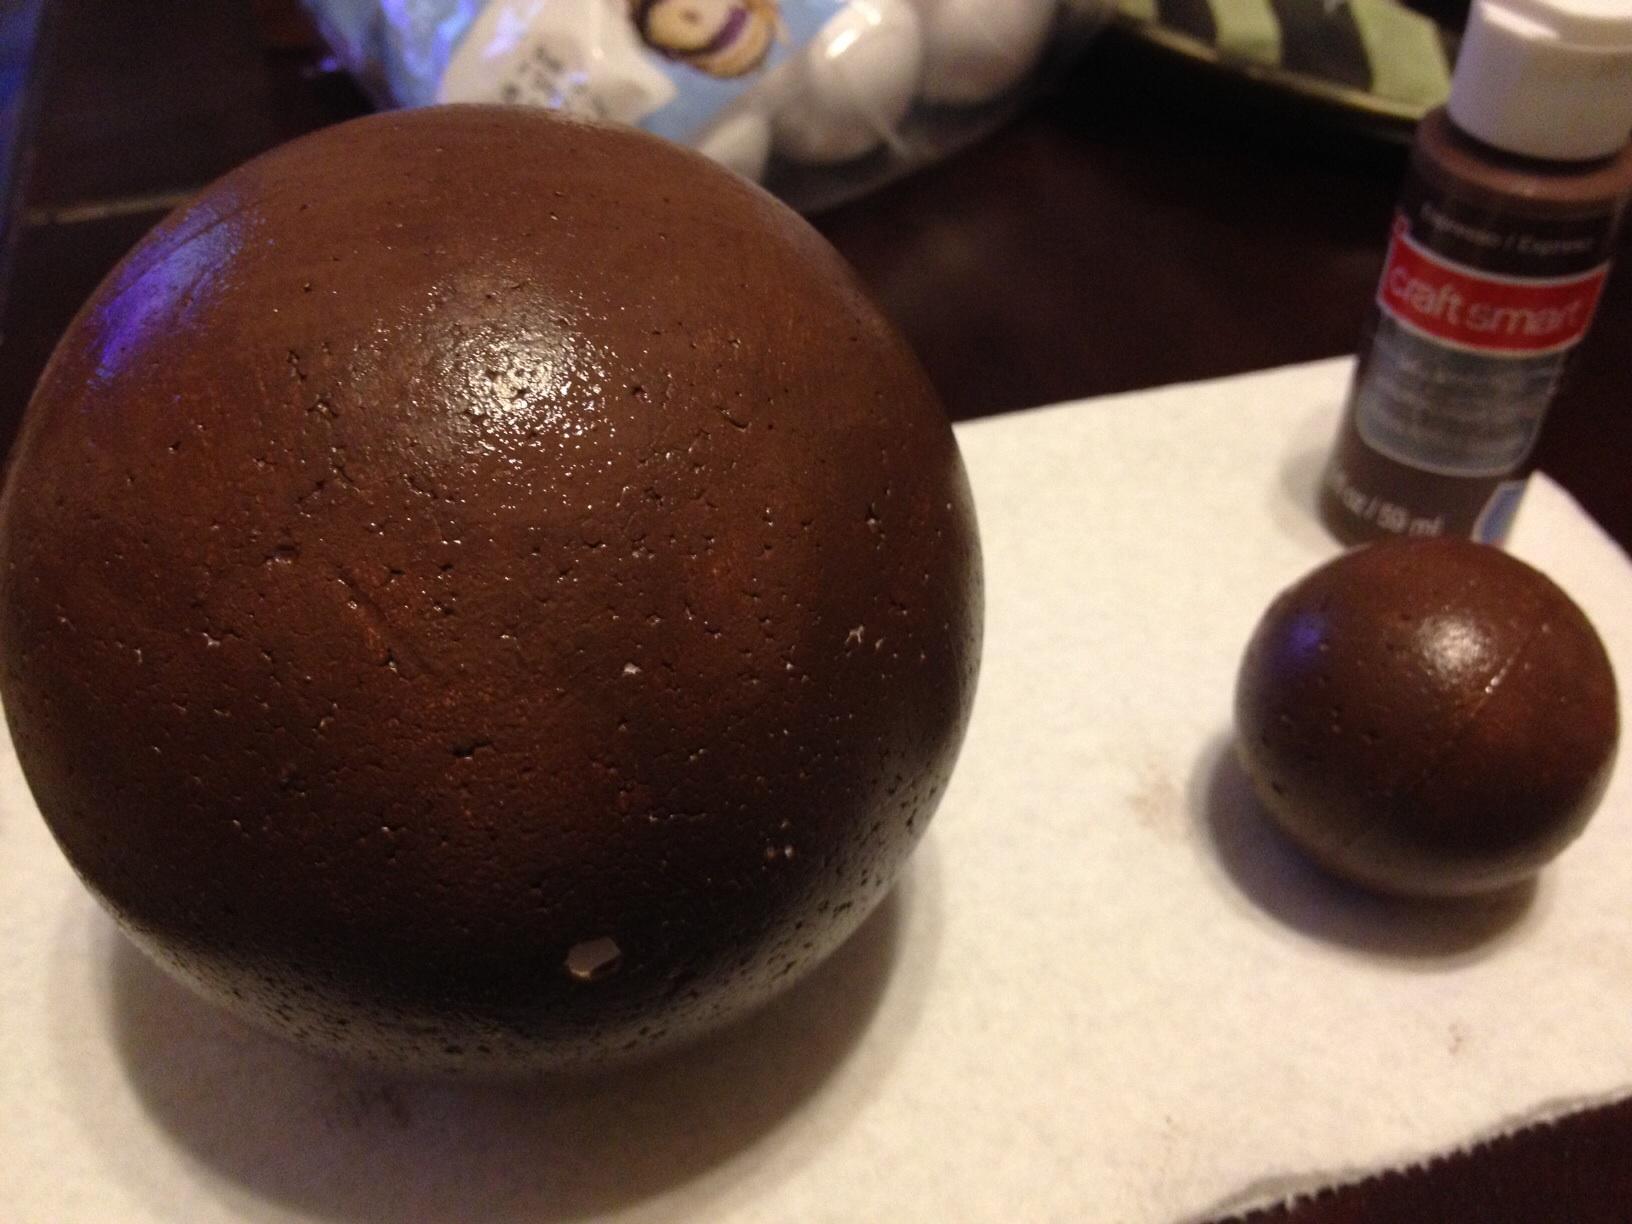
Use the brush to paint both of the Styrofoam balls brown. They can be sanded first to make them more smooth all the way around (there’s usually a little rim around the center and marks on either pole) but it isn’t imperative. To get a dark, even coat on the smooth Styrofoam balls, 3-4 layers need to be applied, the last of which needs to be dabbed on. Without adequate coating, there will still be huge amounts of Styrofoam visible underneath the brushstrokes.

Brown painted Styrofoam balls -
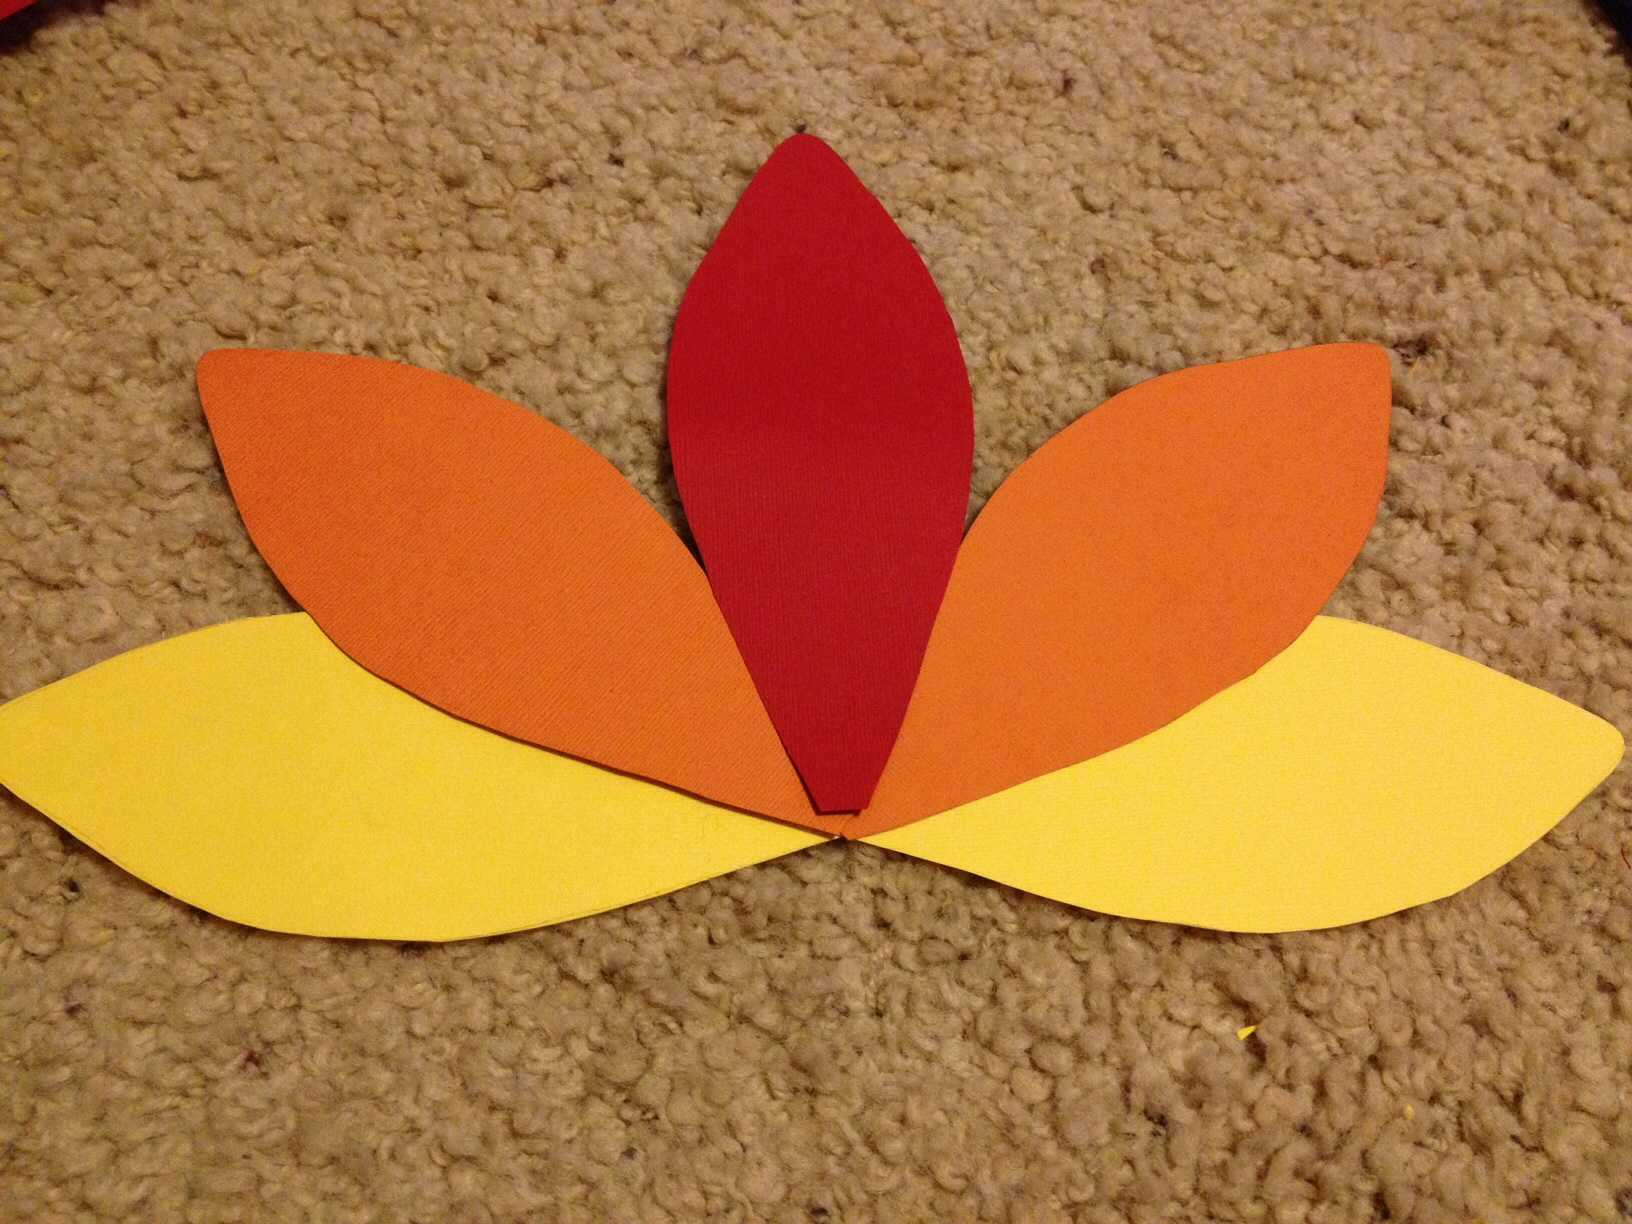
While the paint on the Styrofoam is drying, take out the construction or scrap-booking paper. Draw out an elongated tear drop shape with a flat end which should reach from about the center of the larger ball to a bit above the second ball when the two are stacked on top of each other. These will be the back feathers. Two need to be cut out of the orange and yellow paper and one out of the red.

Turkey feathers made of construction paper -
Arrange the feathers in a fan formation with red in the center, orange on either side of the red, and yellow on the outside. Try to make the bottom of the fan as flat as possible and glue the layers together. Let it dry for a little while.

Feathers arranged in a fan pattern -
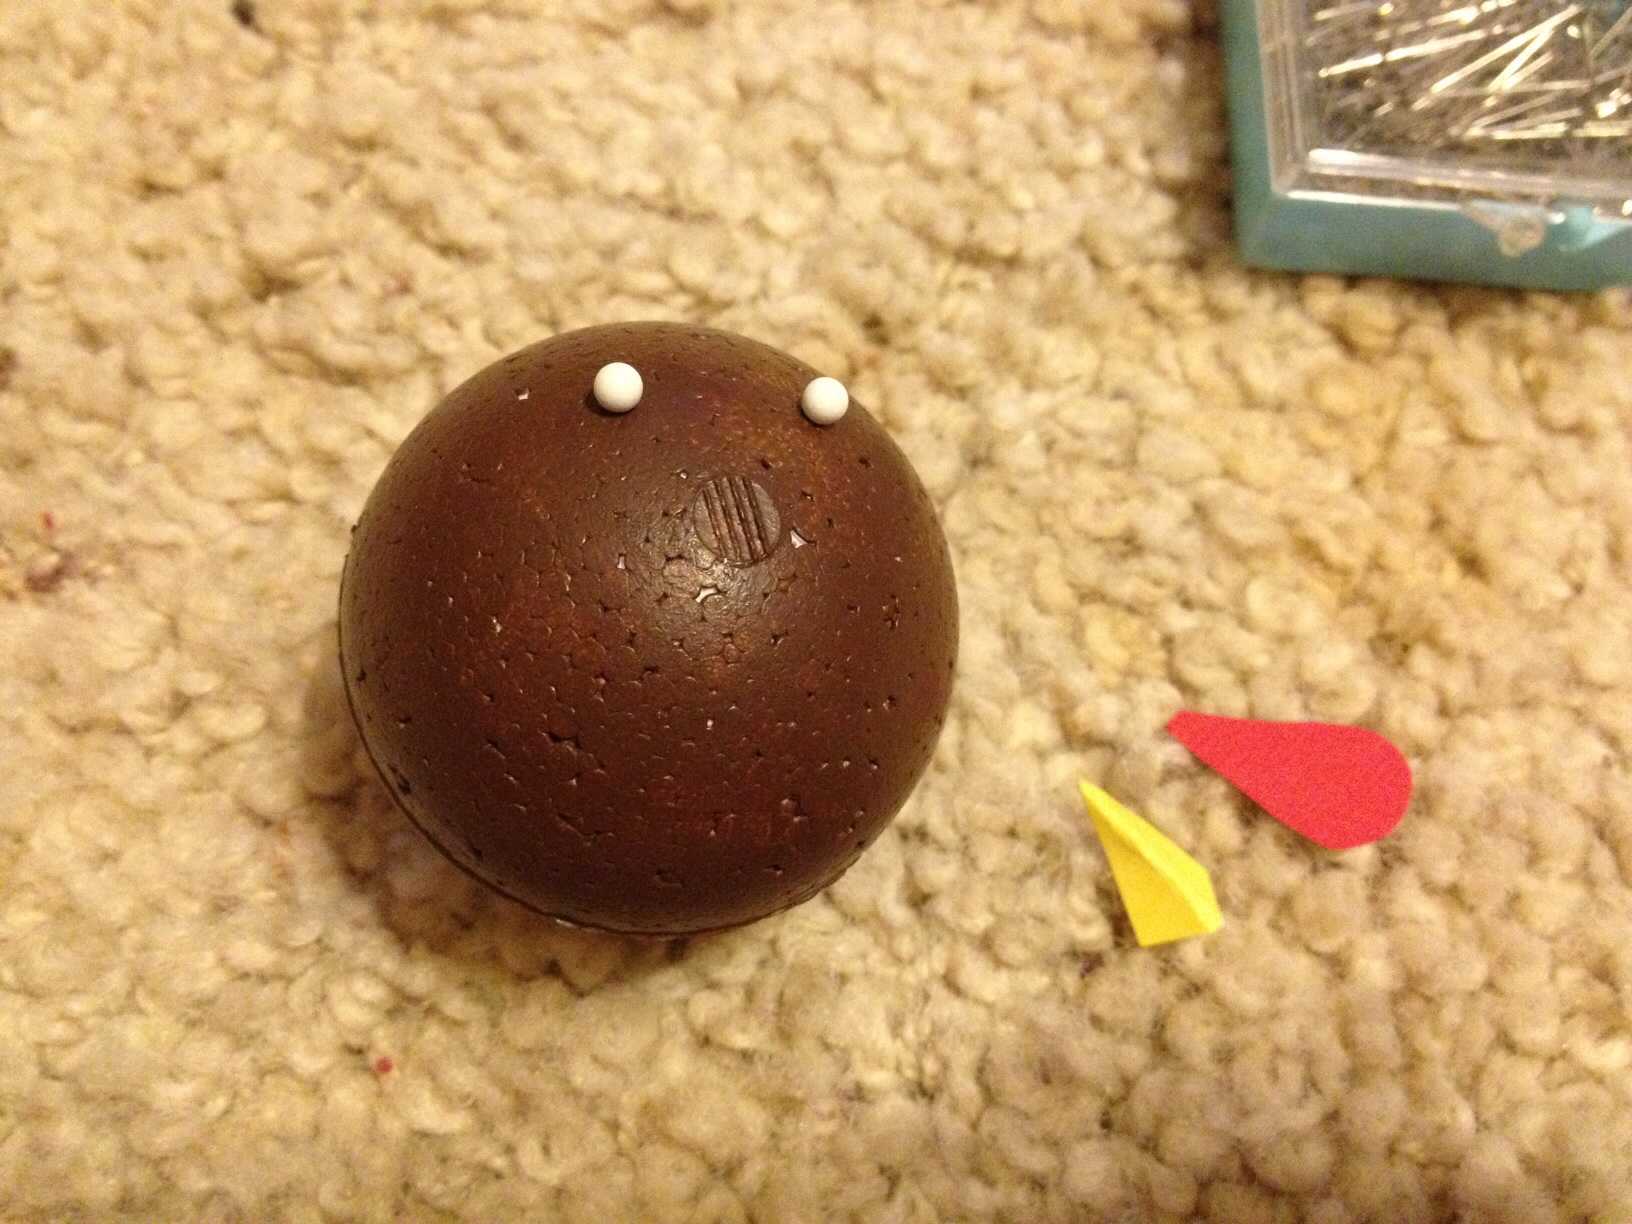
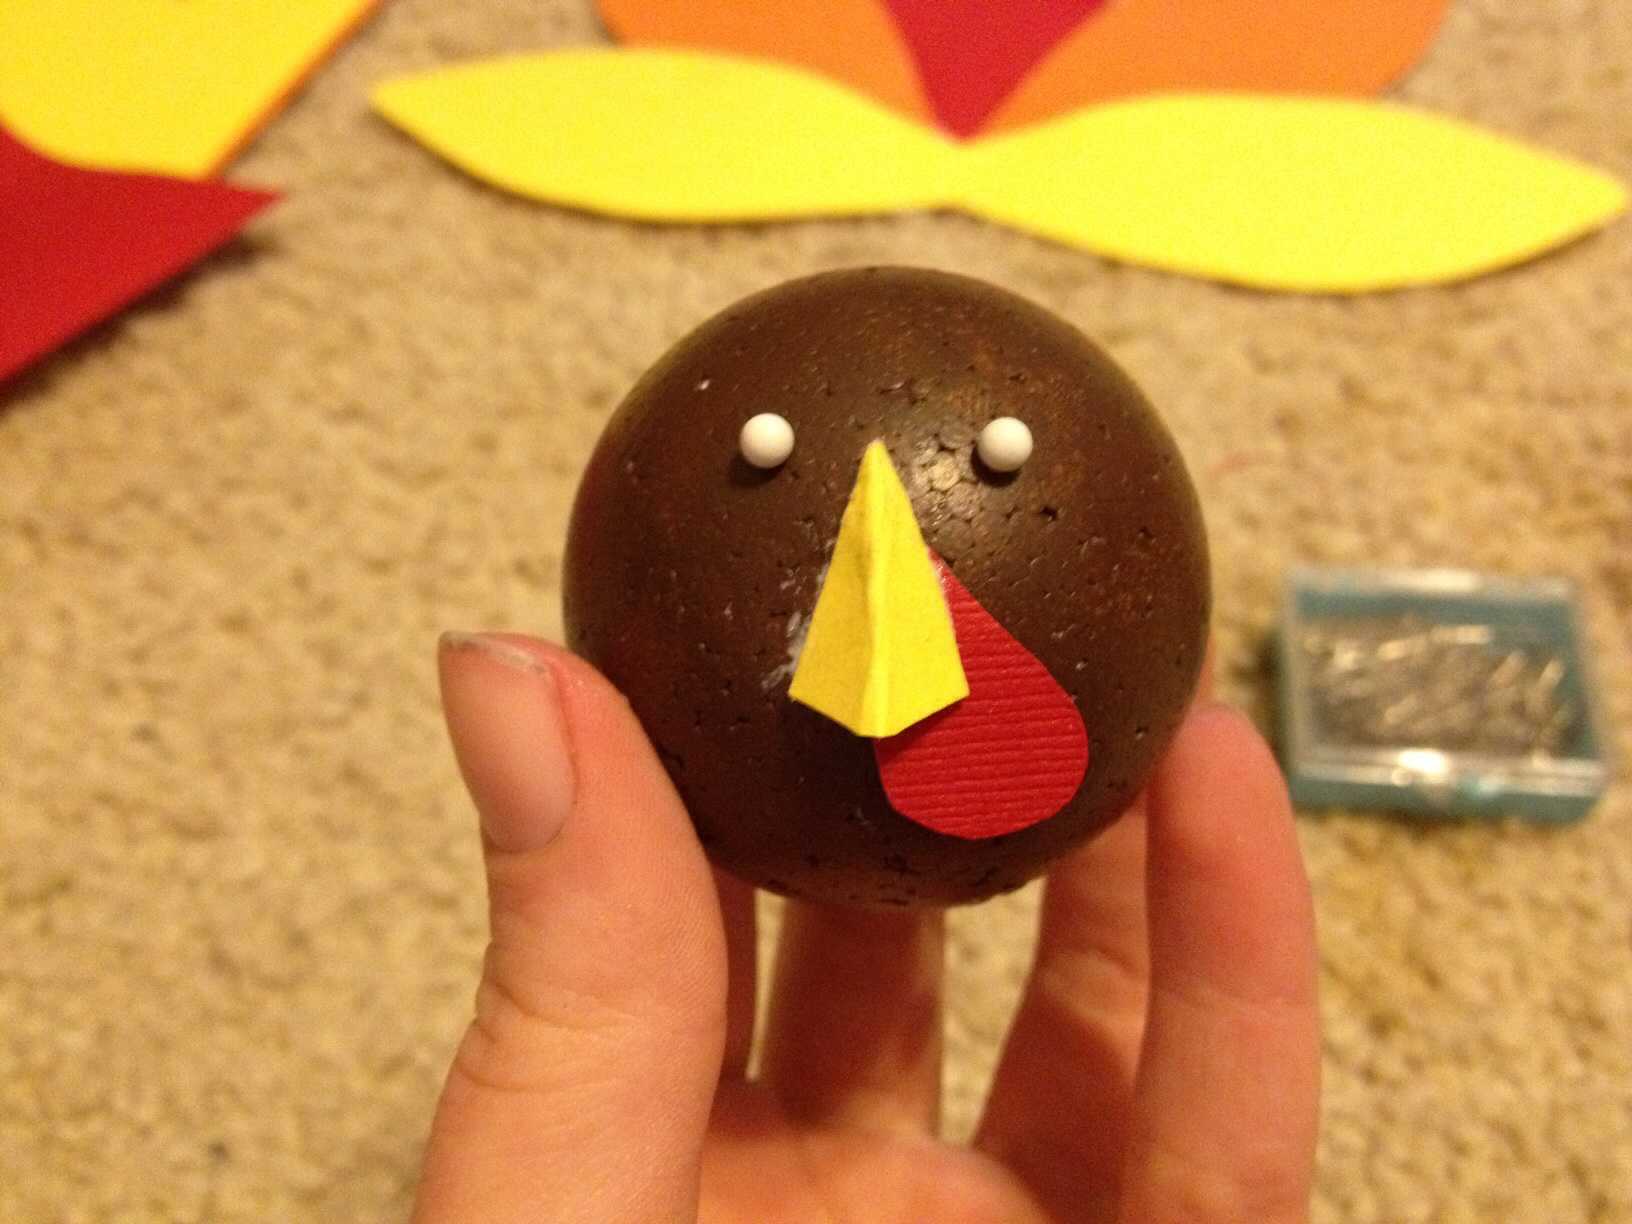
Take the smaller Styrofoam ball and the white pins and stick the pins just above and on either side of one pole of the ball (there should be a hole on one side, and a circle on the other. Use the circle side and pretend as though the circle is the beak; this should help with placing). Then cut out a beak and glottal from yellow and red paper. If you need help, refer to the pictures below. Use a straight pin and attach it just to the side of the circle, then bend the beak in half and glue it so that the top covers up the pin in the glottal.

Turkey face before pinning the nose

Turkey face after pinning the nose -
Take the tail and attach it to the middle back of the larger Styrofoam ball with straight pins. They will be difficult to get through multiple layers of paper, but they won’t go anywhere.The pliers may come in handy for this step

Feathers being pinned to the back of the turkey -
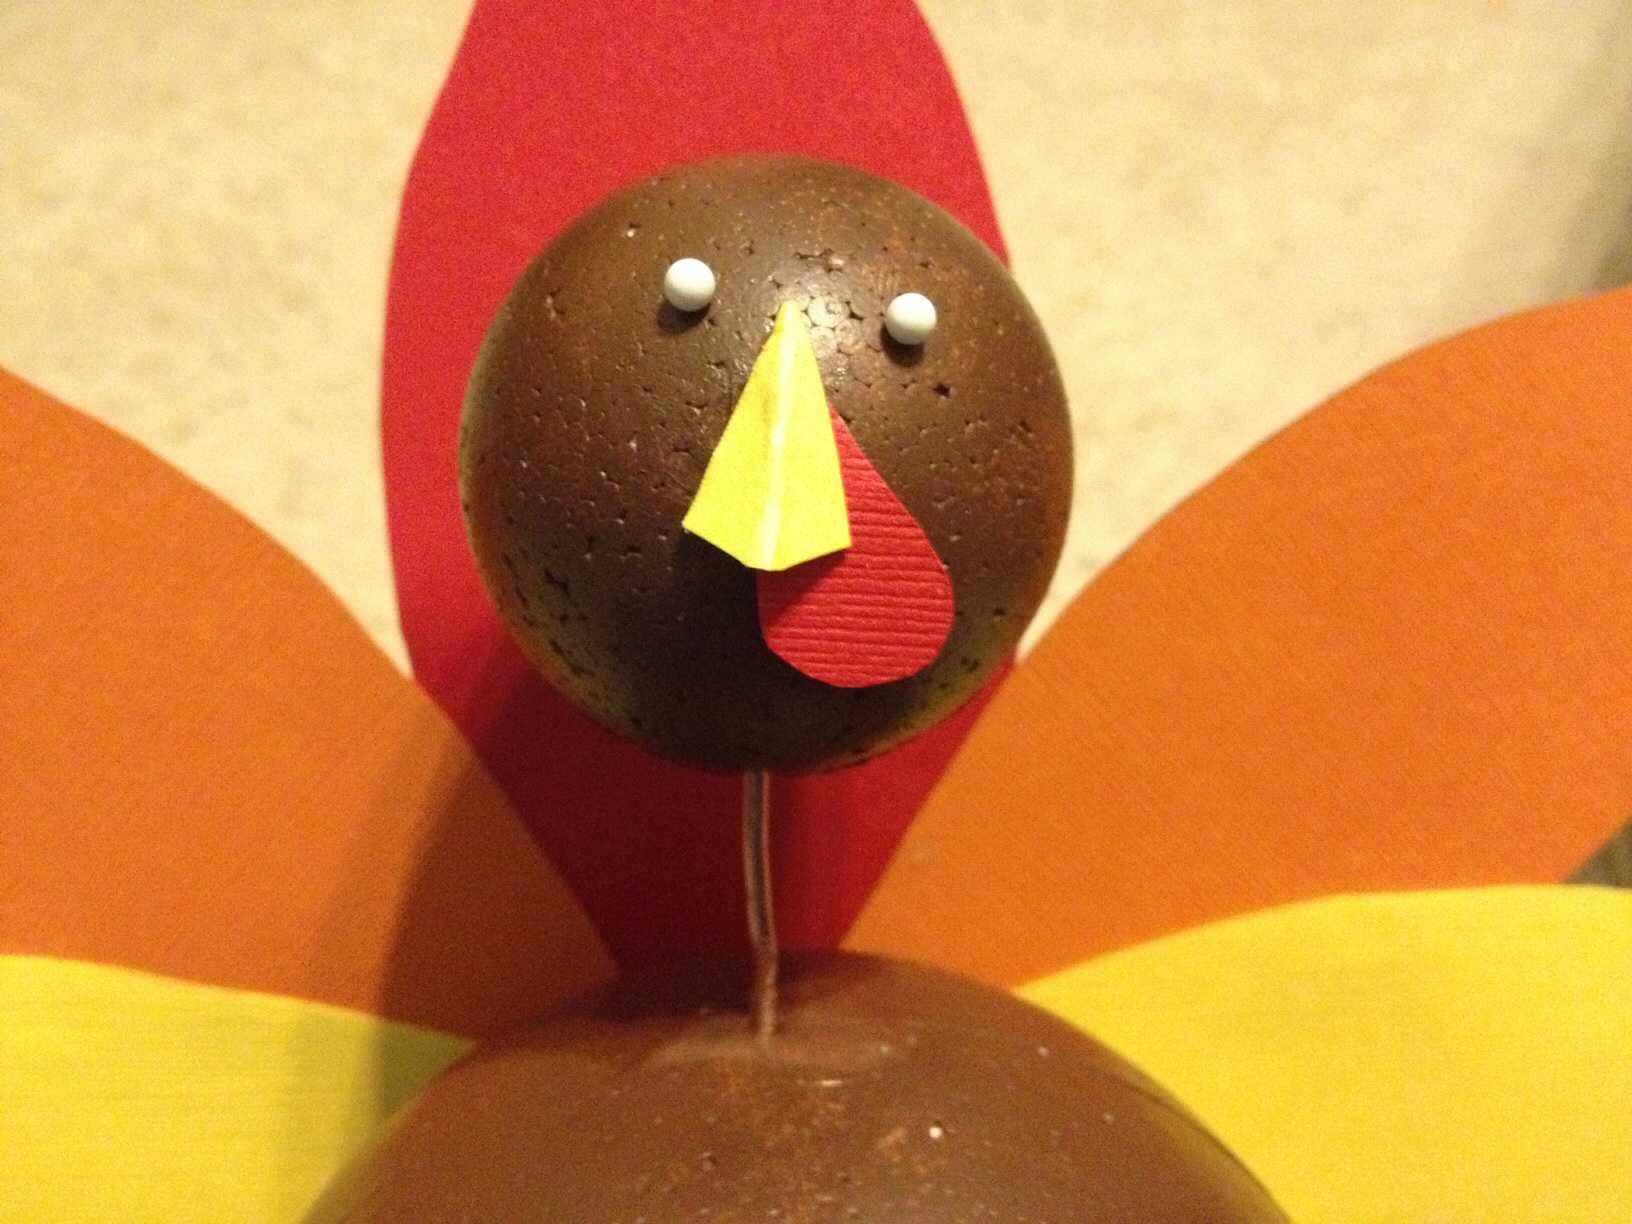
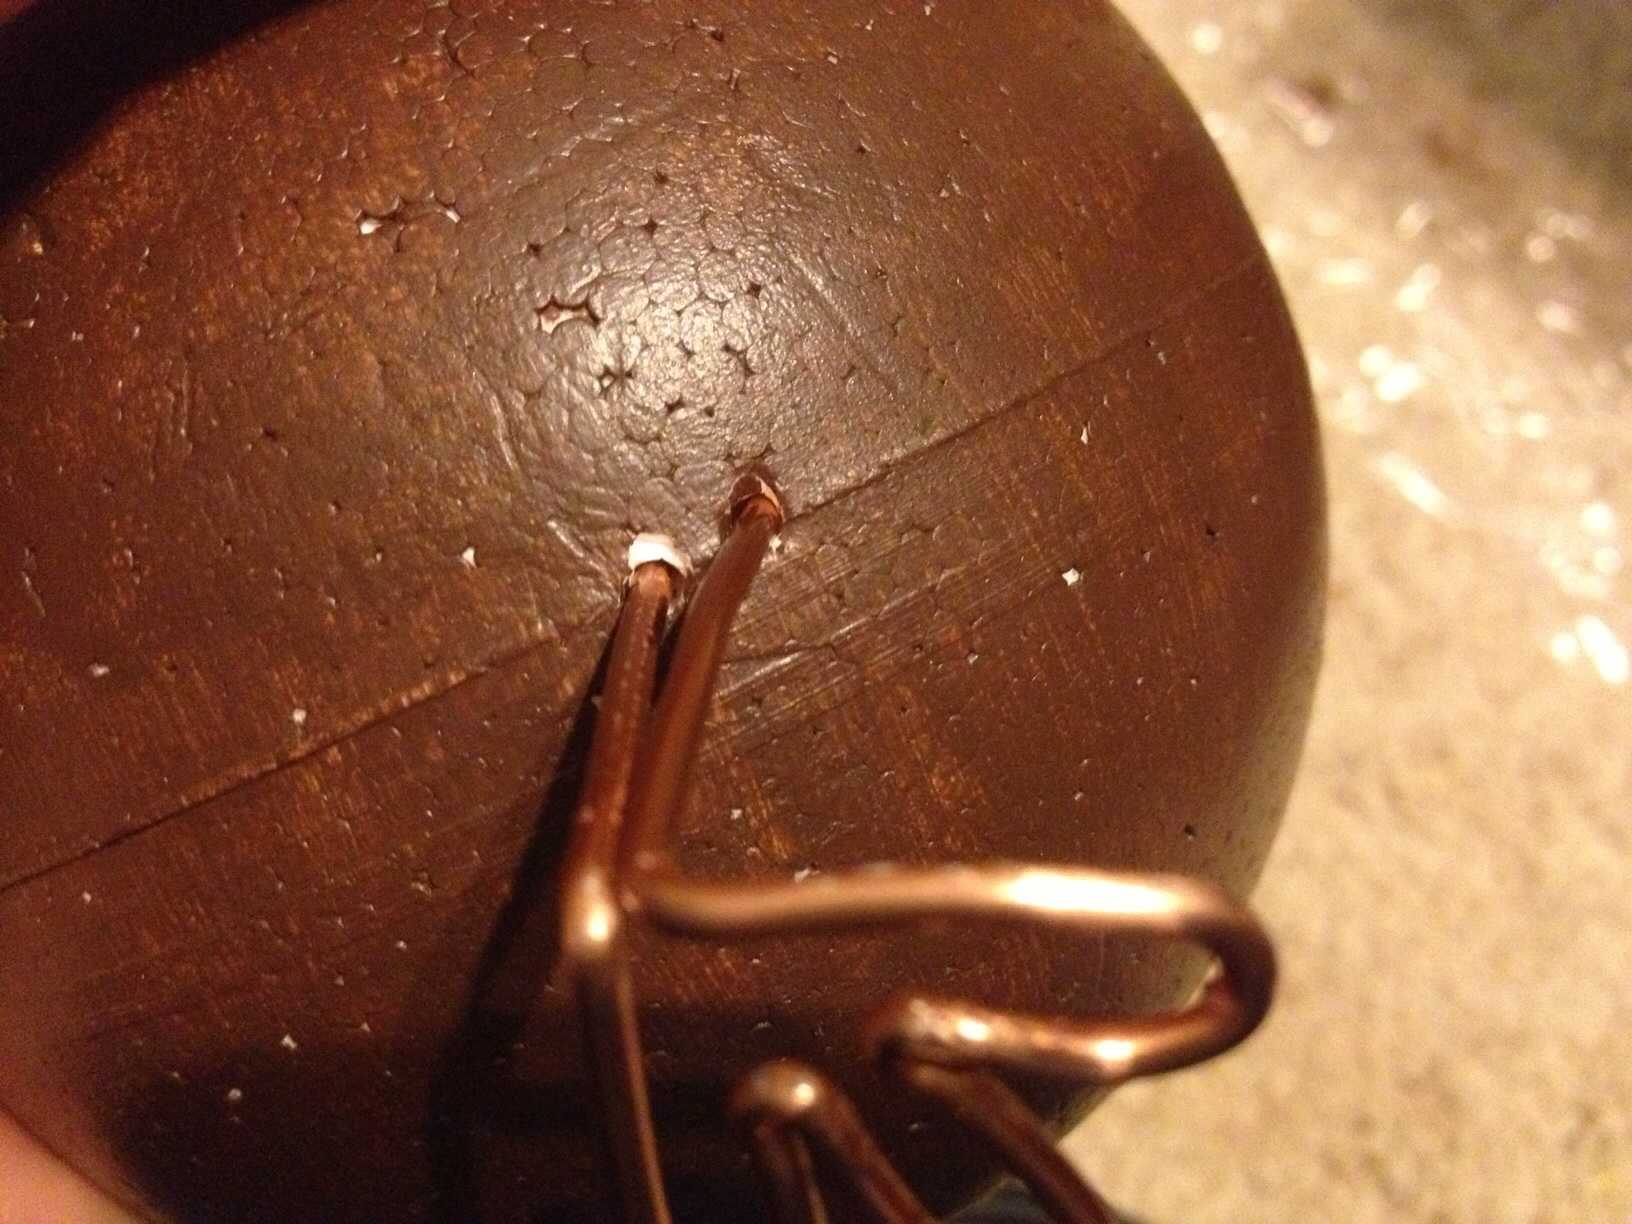
Find a spot near the top middle of the larger Styrofoam ball and mark it in some way. Find the middle bottom of the small bit of Styrofoam (the head) and mark that as well. Use a straight pin to mark the spots, like pre-drilling a hole in wood, so you can easily put in a piece of wire. Cut a short piece of wire and carefully drive it into the hole in the body Styrofoam about halfway; the pliers should help again. Once half of the wire is inserted, start to carefully put the head onto it at the spot which has been pre-drilled.

Attaching the turkey head to the body -
Cut two pieces of wire around six or eight inches long; these will become the turkey’s feet. Fold one of the pieces of wire in half, letting the fold stay rather wide, then, using the pliers, fold over either side sharply. Fold each side over again, loosely this time, then take each side and fold it at a 90-degree angle at the middle of the three toes. Repeat with the other piece of wire. The pictures below illustrate this step for additional help.

Turkey feet made out of wire -
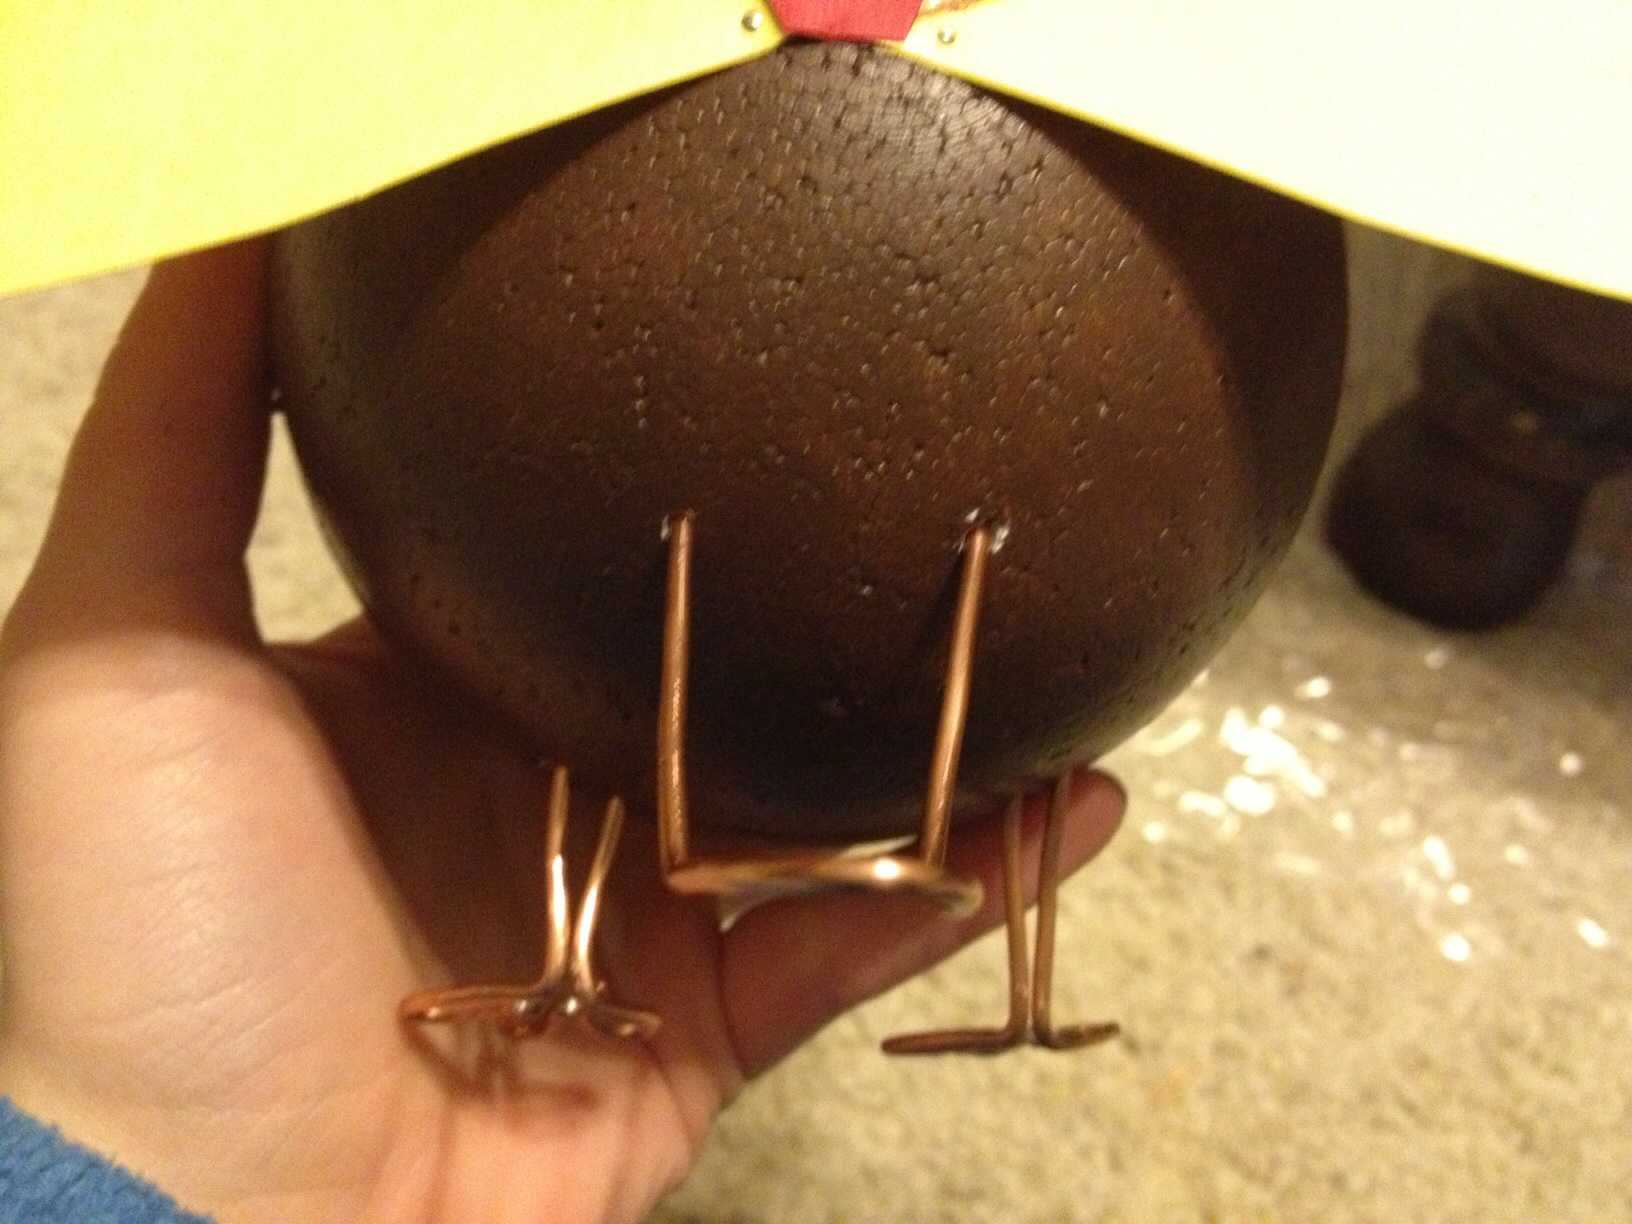
Find two spots on either side of the center bottom of the body and make drill two holes just under a half centimeter away on either side. Drive each wire of the foot into each hole. Leave about three-quarters of an inch of legs under the body. Keep in mind that the Styrofoam is not flat, and one side of the leg in will be in further than the other in order to keep the feet flat.

Turkey feet inserted into base of Styrofoam ball -
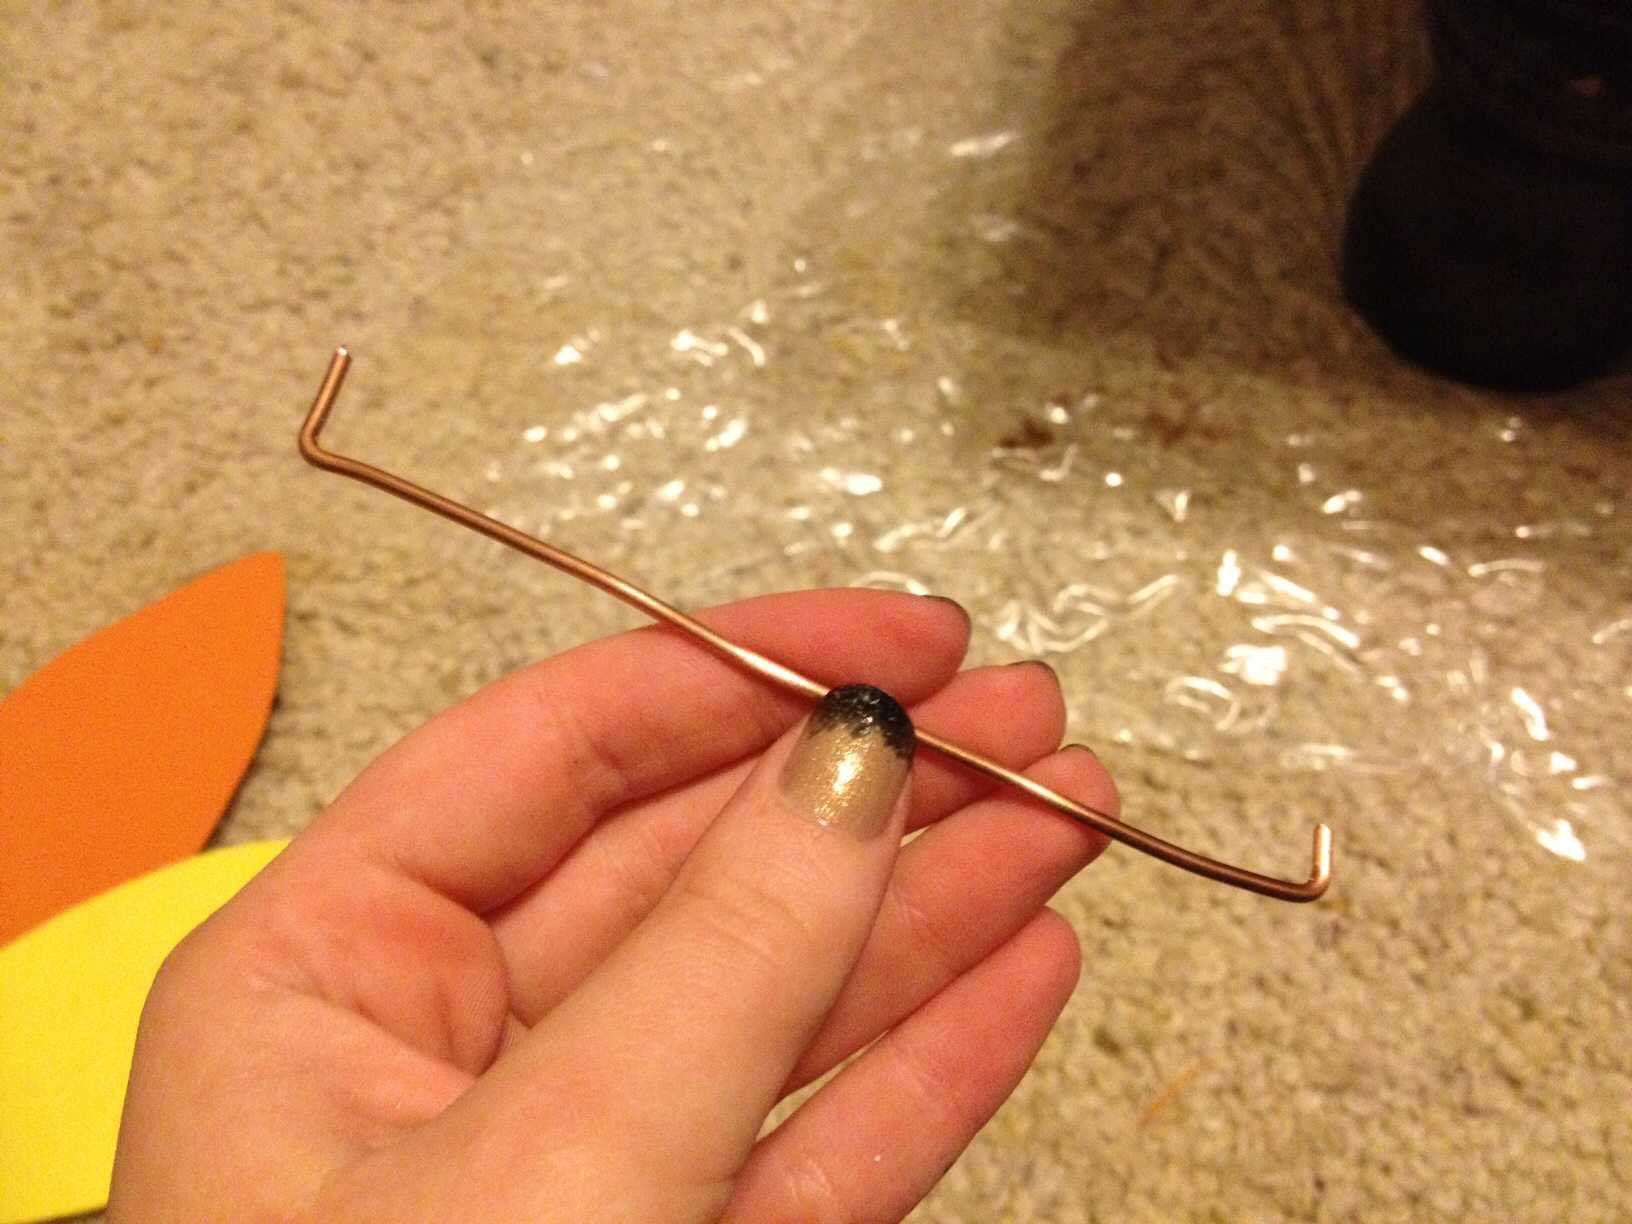
The turkey is a bit top heavy, so the feet will not be able to hold it up alone. Cut another piece of wire about six inches long and fold it in half, leaving it extra loose, and make a wide angle about a centimeter up from the end. Drill two holes about an inch apart on the back of the turkey, about an inch and a half down from the tail. Drive the wire into either hole in order to make a little tail to keep the turkey standing on its own.

The backside of the turkey with the extra tail to keep it balanced -
Cut two more pieces of wire about five inches long and bend either side over at a 90-degree about a half centimeter from the end. Bend the full wire at a gentle curve, just a little looser than a semicircle, and make a mark about an inch away from either side of the wire in the neck. Drill a hole and put in one end of the wire. Gently bend the wire downward and mark where the other end lands, drill a hole there and insert the other end of the wire. Do the same on the other side of the body to create the wings.

Bent wire


That’s it, an adorable little turkey who can stand on his own and decorate any Thanksgiving side table with some homemade flair. Happy Turkey Day!

By Madi Mertz
Do you have time for crafts on Thanksgiving or do you spend the day in the kitchen or watching football?