


This holiday season, present your desserts in a delicious fashion. Use these chocolate bowls to eat anything from cake to ice cream to more chocolate. This project will only take about an hour and will be the perfect addition to any dessert.
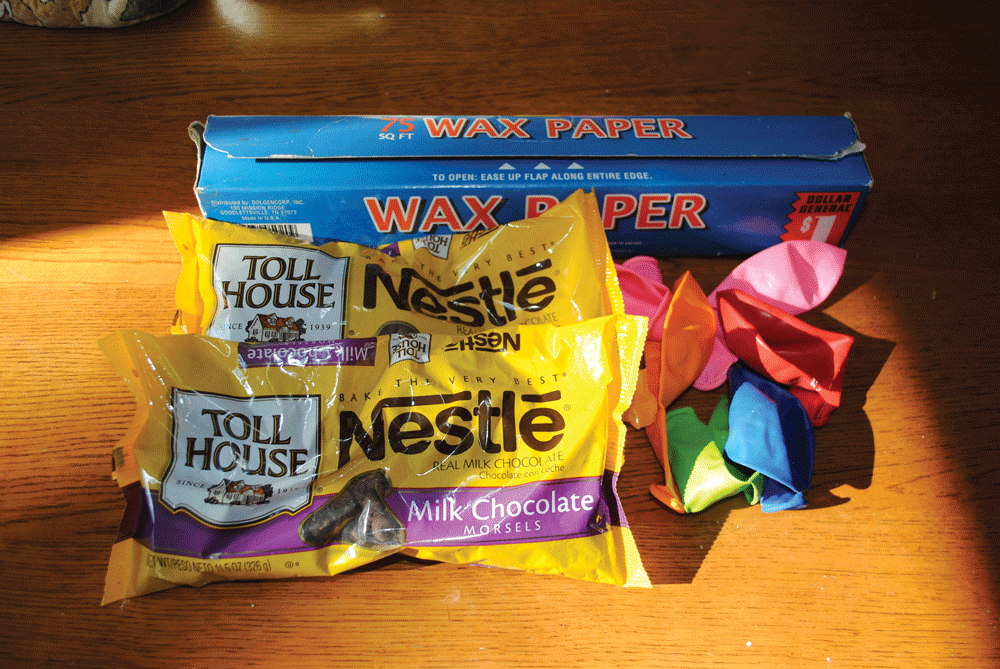
[box title=”you will need”]Wax paper Pan or Tray Double Boiler (Substitution for a double boiler: regular pan with a bowl that fits inside. Cannot be plastic) Balloons Chocolate (any kind) Bowl Large spoon Regular Spoon[/box]Wax paper
Step 1: Melting the chocolate
Start out this DIY by dumping all of the chocolate you’ll need into the top section of the double boiler, or the regular non-plastic bowl to substitute for a double boiler. With the bottom section of the boiler, fill it about one-third of the way with water and bring it to a low boil on the stove. Once the water has been brought to a boil, the top pan or bowl of the double boiler can be added. In order to keep the chocolate from being burnt, stir consistantly. This will take three to six minutes.
Step 2: Preparing for bowl making
There isn’t a whole lot of preparation that needs to take place in order to make these chocolate bowls, but I recommend doing these small things before you begin in order to make the best of your time. The first thing I did was transfer the chocolate that was just melted into a separate bowl to allow for cooling. The chocolate actually needs to cool quite a bit so that the making of the bowls is easier. The second thing for preparation is placing down wax paper onto your pan or tray. Lastly, wash the balloons you are planning on using because there can be all kinds of junk on them.
Step 3: Making the chocolate bowls
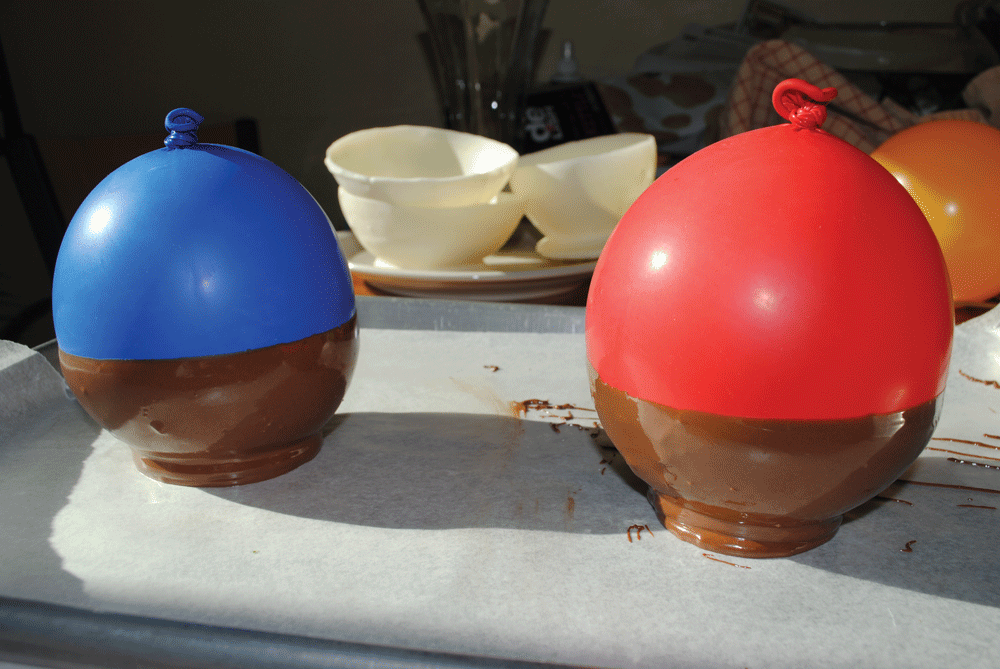
The best part is here; making these delicious bowls. Start by blowing up your balloons to whatever size you’d like, although smaller balloons allow for easier bowl-making. The most important part about making these bowls is making sure that the chocolate is not too hot, actually almost cool, because if it’s too hot, the balloon will pop. On your wax paper, take your smaller spoon and put a little circle of chocolate on the sheet. Next, all you have to do is dip the balloon into your bowl of chocolate as far as you want and then take it out. Anywhere from one-third to one-half of the way up the balloon is a good estimate for a practical size bowl. I do this about three or four times with a 30-second wait inbetween dips. When you feel you are ready, connect the chocolate dab on the wax sheet to the chocolate covered balloon. Repeat this step as many times as you want for as many bowls as you’d like.
Step 4: Cooling the bowls
I emptied a place in my refrigerator and stored my bowls there. It took about ten-20 minutes before the bowls were ready to be taken out, but this all depends on what kind of chocolate you get and how much you let it cool before you began. Just experiment to see what works best given your refrigerator and type of chocolate used.
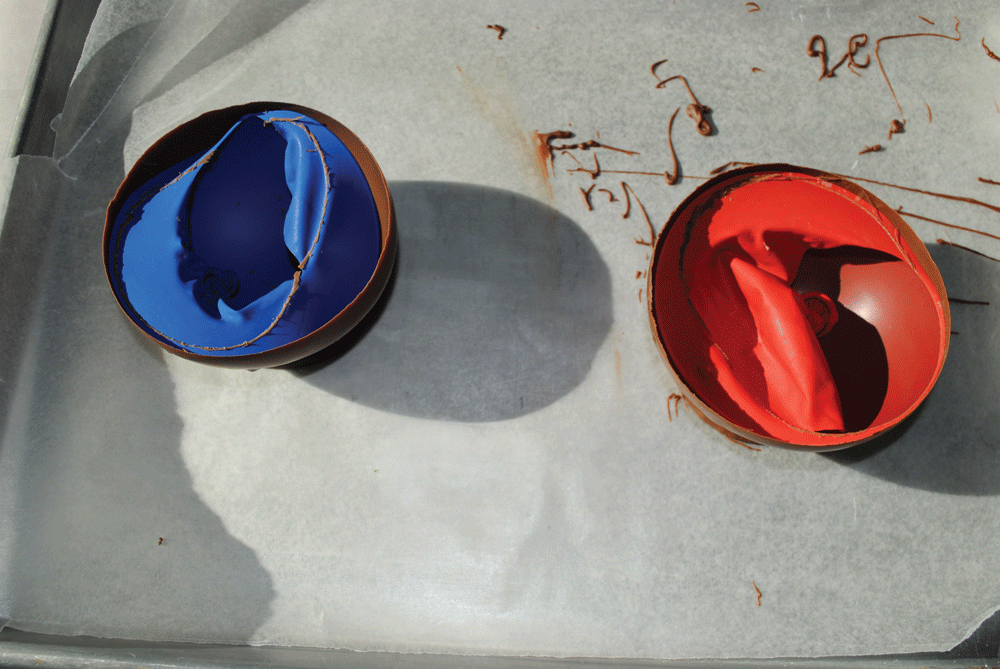
Step 5: Finishing the bowl
The official last step to finishing the bowls is popping the balloons and then removing them. Make sure the chocolate is fully cooled before popping. If your chocolate is ready to have the balloon popped, once the balloon pops, it will not move from the shape it originally took. The last thing I did was take a knife and reshape some of my bowls to make the tops even. This isn’t necessary but it can be a nice fixer-upper for a bowl that was uneven.
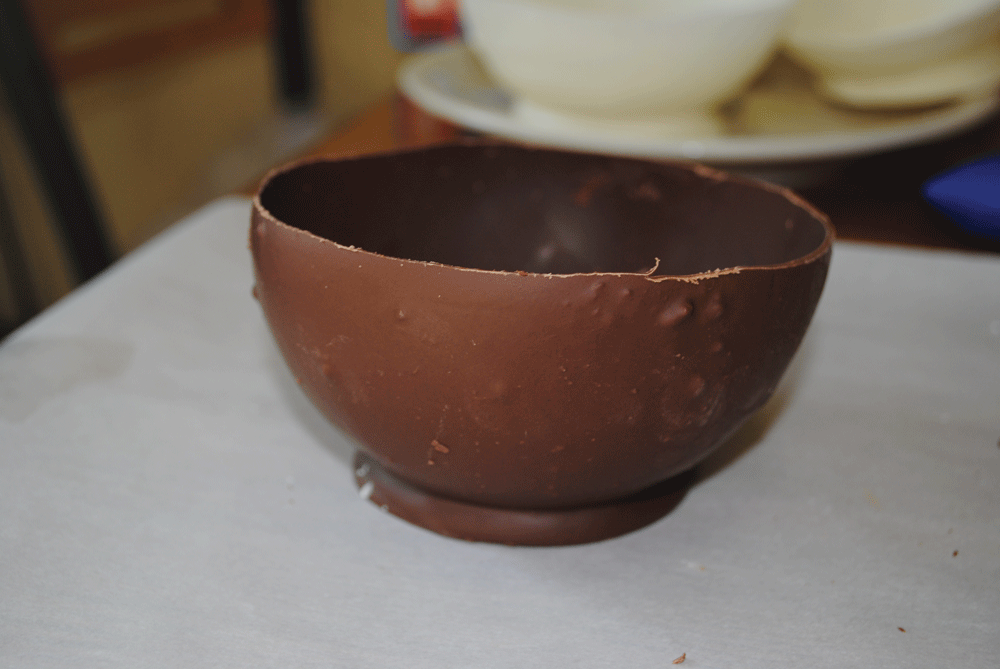
Once you’ve made your bowls, they are great for pairing with your favorite dessert and serving at your Christmas dinner. I used cheesecake in my bowls, however most desserts can work with chocolate. As you go along, the bowls become easier to make. Practice makes perfect. This craft is sure to impress your friends and family, and, who knows, you might even impress yourself. Good luck!

By Renata Williams