You Will Need:
-
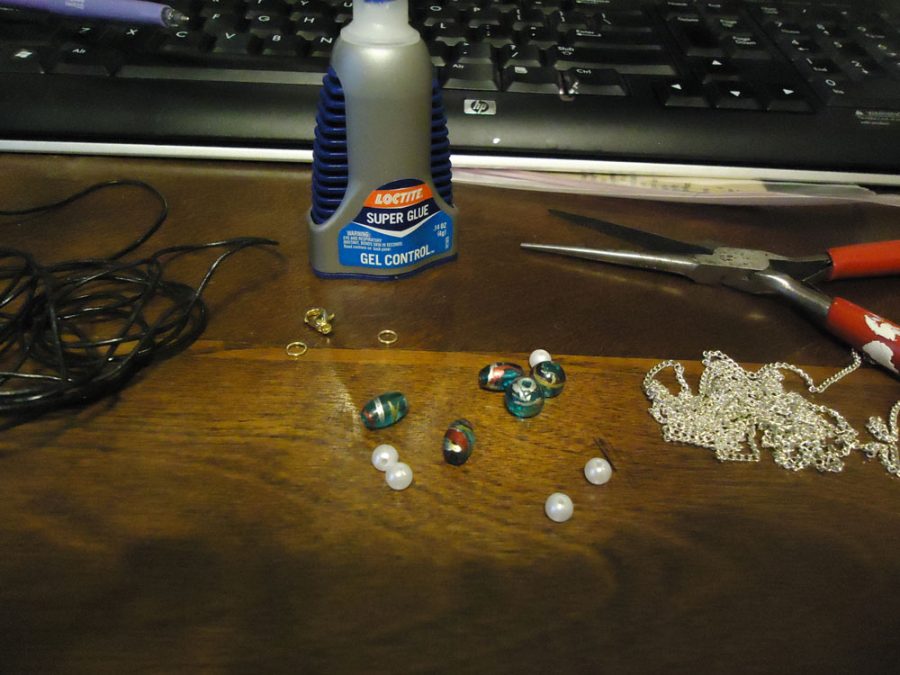
needle-nose pliers (preferably with attached wire cutters, if not, than something to cut wire with as well)
-
a clasp
-
some leather cord
-
scissors
-
some chain
-
beads
-
super glue
-
two “O” rings
Takes about 2 hours to make, give or take a bit depending on experience.
-
First, you’ll need to cut your chains and cord to the correct length. Try measuring it on your ankle so that it fits snugly around. When you add the clasp, it’ll add a little bit of width so that the anklet be rather loose when you’re wearing it. The chain needs to be cut with wire cutters, which come standard on many pliers. (I lost mine, so I’m using a pair of old scissors. This is not advisable, parents will not like it, it’ll mess up your scissors, and the severed link will fly) Be sure to accommodate an extra link on your chain measurement, as the link severed to shorten the chain cannot be saved. Cut the leather a couple inches longer than the chain so that there’s room to knot it. It can be trimmed later on. Cut two lengths of chain and one length of cord.
-
Now, use the needle-nose pliers to pry one of the “O” rings open. This can be done quickly and easily by expanding the pliers inside of the ring.
-
Carefully take the end of one of the chains and thread it through the opened “O” ring. This will take time and patience. Pro tip, try holding the ring between your fingers and the end of the chain in your pliers. This will keep the chain from slipping away, and it’ll be a bit easier to see.
-
Once the first length of chain is threaded, take the cord and tie it to the ring next to it. Just tie it once, and tie it taught, but not too tight. If you keep tugging on it over and over, the leather will break. Make sure it’s relatively tight, and move on. Don’t trim it just yet.
-
Take the second length of chain, and repeat step three on the other side of the leather. You should have a piece of leather tied to an opened ”O” ring with a length of chain on either side of it.
-
Thread the clasp onto the ring
-
Use the pliers to close the “O” ring. Simply squeeze it together on either side just enough to close it. If you squeeze too hard, it’ll smoosh the ring.
-
Use the super glue generously on the knot of the leather and let it dry a while. Only when it is no longer tacky, and seems to be holding well can the end of the leather be trimmed. It’s always a good idea to wait until completely finished to trim any of the leather.
-
Pick out some beads. The whole anklet will not be beaded, just pick between one and three with large holes for each length. String the beads onto the strands. Tip, threading beads onto leather is a lot easier if you cut the end at an angle.
-
Take your other “O” ring and pry it open. String the chain in the same order as the other ring so that the anklet doesn’t become twisted, follow the same procedure for the leather as on the other side, but be sure that it is the same length as the chain.
-
Close the “O” ring.
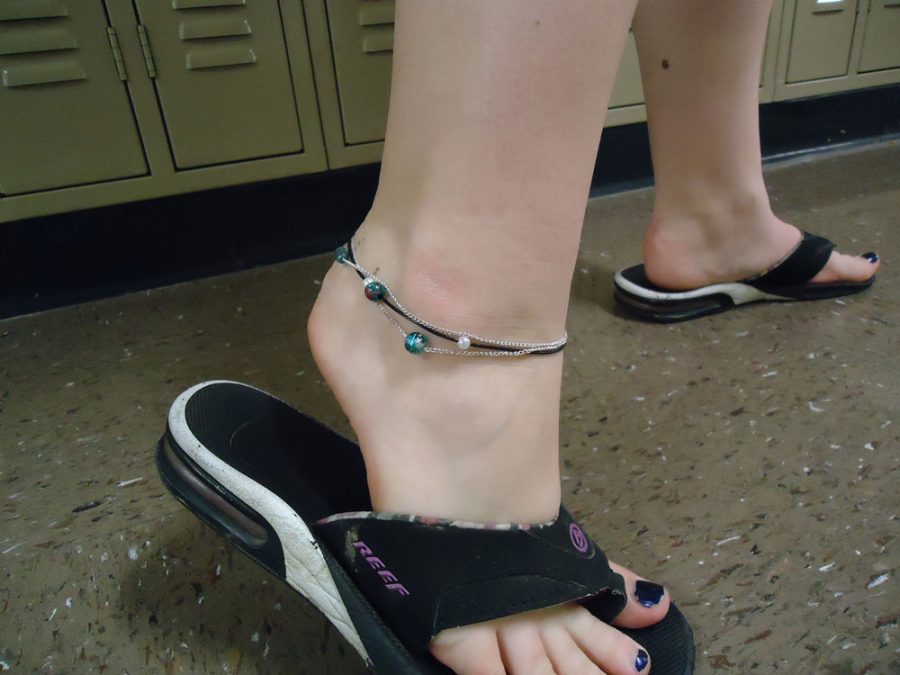
The end result should be a unique summer accessory to accentuate new shoes and short shorts. You could try this with multiple chains instead of leather, 4 or 5 chains instead of 3, more beads, the possibilities for personalization are endless.
By Madi Mertz
If you try making this at home, tweet me a pic @MertzMadi, it’d be fabulous to see what you come up with.


